
So you wanna learn how to crochet the star stitch, eh?

Well then, I do hope my little photo-tutorial (which, if you don't look too closely, actually kind of looks like I might know what I'm talking about) will help you not only figure it out, but go on to make various lovely star-stitched creations to your heart's content. So here we go:
First, make a chain of a multiple of 5, plus 2 more chains. (Please don't count the chains in my picture, because they didn't follow the above math rules) (but it all works out okay in the end, due to the magic of trick photography).
OK, so unlike me, you've made your "multiple of 5 plus 2" starting chain.

(Please just pretend that this one has 22 chain stitches.)
Now, we will begin to make our way down the first row. This is the row where the bottom "half" of your stars (or daisies, if you like) will be formed.

Insert your hook into the second chain from the hook, yarn over...

and pull up a loop. Two loops on hook.

Insert your hook into the next chain, and pull up a loop, and then insert your hook into the next three chains, pulling up a loop each time, so that you now have six loops on your hook.

It's very important to keep things very loose - pull the last loop that you made up just a little bit more than the others (you'll find out why in a second)...
then yarn over..
(Wooops! I just noticed that in the above picture, there is a large loop of yarn showing, kind of behind the hook... ignore that! That's not what I mean by making your last loop loose... that's just a piece of my working yarn apparently thinking it would be hilarious to photo-bomb this picture, just to confuse you. So just kind of mentally erase that big sticking-out loop in the picture, and keep your loops on your hook just slightly more loose than normal, with the sixth one being a tad more loose.)

...and pull through all six of the loops, LOOSELY. Be gentle. Think of starlight and daisies,
as opposed to reigning in wild horses.

Yarn over and slip stitch. The little cluster of "petals" will look closed up.

Now you are going to insert your hook right into the hole in the "center" of the cluster of petals,
the one you just created by slip stitching it "closed."

Yarn over, and pull up a loop. Two loops on hook.

Now, here is why you were keeping it so loose, baby! The next stitch that you are going to insert the hook into is the BACK LOOP of the sixth (i.e. the last) loop of the cluster of petals...(Gosh that does sound confusing, but if you take a deep breath and envision what you've done thus far, I think you'll see what I mean.)
It is very small (see where the metal sewing needle is poking through it?) If you had whipped those little petals shut with a vengeance and pulled them tight, it would now be very hard to poke your hook through that back loop of the last petal. I'm sure you were dreaming of wafting through a field of daisies in the starlight while wearing a gauzy kaftan ('cuz that's the kind of folks my blog readers are) while you were pulling through your six loops ever so loosely, so you should have no trouble at all. However, if you should happen to find that wee back loop just a smidge too tiny, there is no shame at all in using your fingers or fingernails to pry it open while grunting and swearing (that you'll be much looser when you make the next one).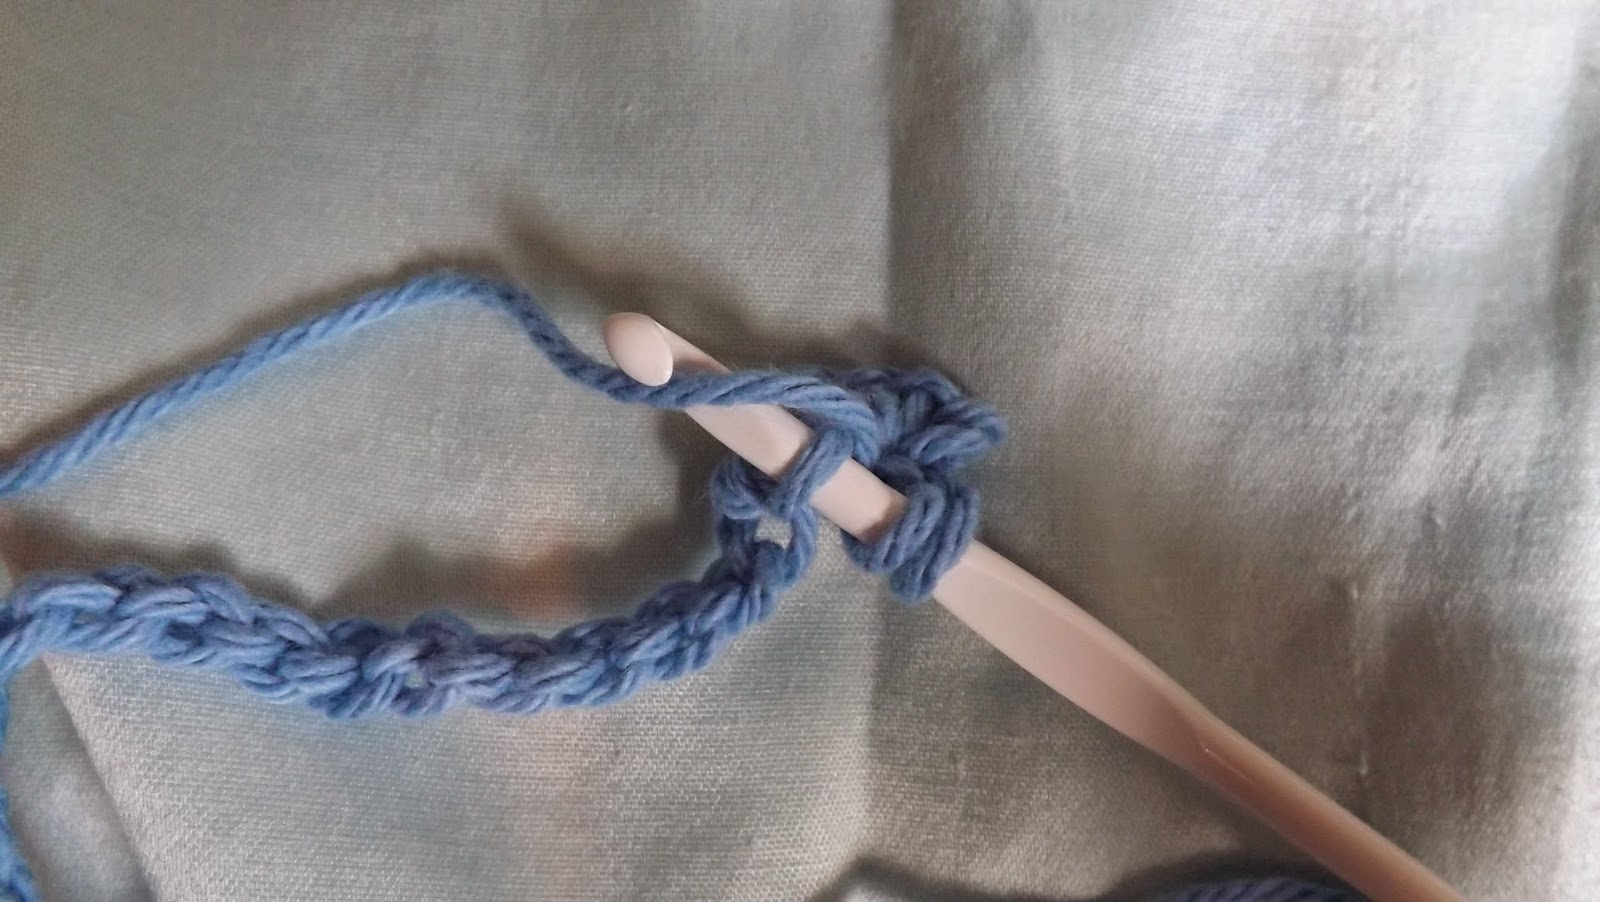
It will be easier to see and maneuver here if you look straight down on the top edge of your work, or twist it toward yourself a little bit. Forgive me for going on and on about this one small part, but it's worth keeping in mind, as this will greatly speed things up as you go along making stars and spare your fingers and the delicate ears of innocent bystanders from many unpleasantries. I promise that this is the only really tricky part, and once you see how loose to keep things, it will cease to be tricky.
I will now shut up so that you can yarn over ...

...and pull up a loop. Three loops on hook.

The next stitch you insert your hook into is actually the first chain stitch, but it looks a little bit pulled out of shape. Yarn over, insert your hook into the unshapely chain stitch, and pull up a loop -
now you have four loops on your hook.

Insert your hook into the next two chains, pulling up a loop each time, so that you now have six loops on your hook. (Six loops is what you will keep making and pulling through, LOOSELY, to make the bottom half of your stars ((or daisies)) all the way down the row).

Yarn over, and just like you did last time, LOOSELY (I can't seem to stop screaming that, it must be the overall giddiness) slip stitch to close up the petals.

Now, just as with the first star, you are going to insert your hook:
1. into the hole at the center of the petal cluster that you just made
2. into the back loop of the last of the six loops
3. into the stretched-out-looking next chain stitch
4. into the next two chain stitches
pulling up a loop each time, until there are six loops on your hook.
Now just as you've done with the other stars, yarn over, and slip stitch the petals closed. Got that?

If you do, and you keep repeating all those steps, you will have star-bottoms all the way down to
the last chain stitch of the original chain, and you will end the row by closing the last cluster of petals with a slip stitch. This is the "right side" of your work.

Now, turn the work around. This is the back or reverse side of your work.
IMPORTANT: When you turn your work around, keep the working yarn BEHIND your work, just like in this picture. (Sorry for shouting ((and "behind" of all things)) but if you don't make sure to keep the working yarn in back, you'll run into twisty problems later.)
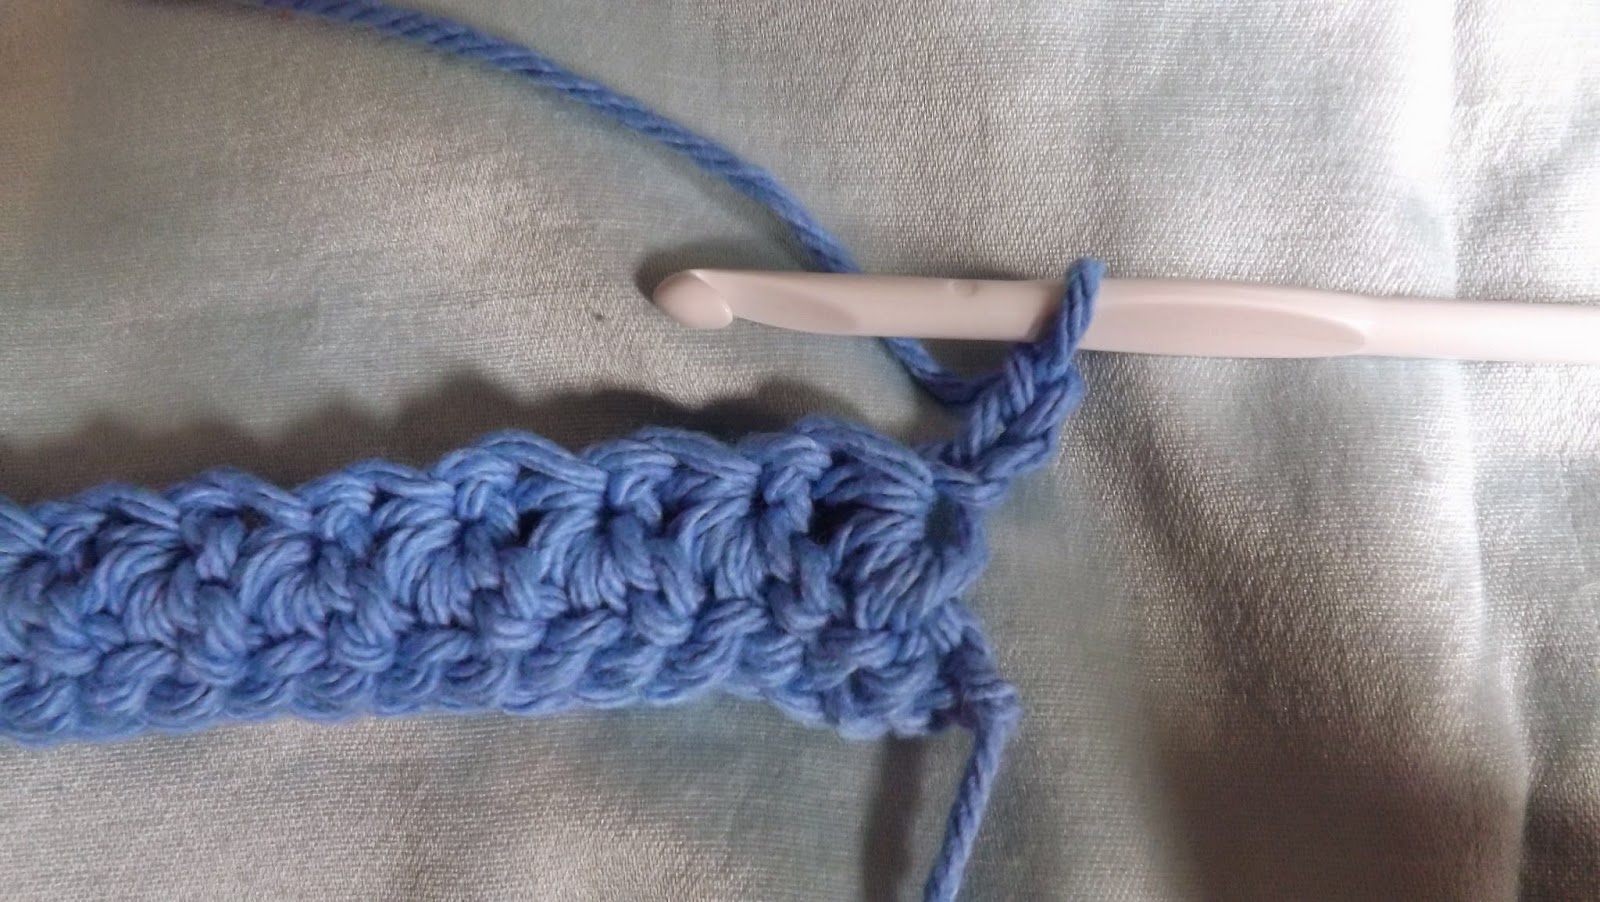
Chain two.
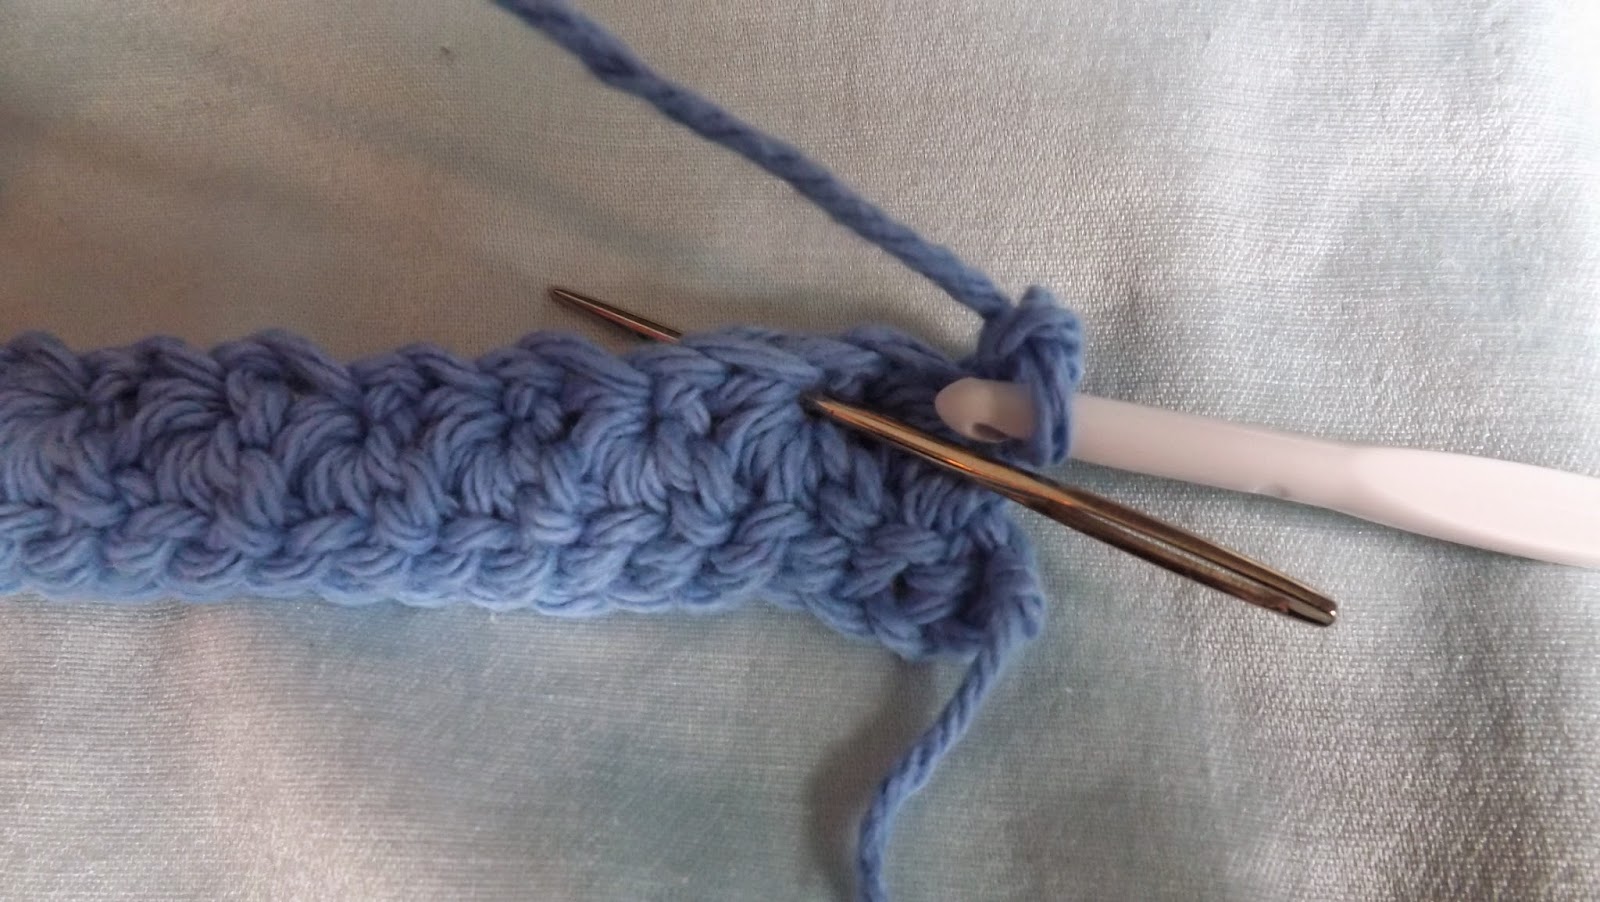
You're going to make two half-double crochets into the center hole of the next cluster of petals (I stuck the sewing needle in to show you the spot). So, to make your first half-double crochet into the hole, yarn over...

...insert your hook into the center hole, yarn over again, pull the loop through to the front...

...and now yarn over and pull through all three loops on your hook. One half-double crochet made.

Now make another half-double crochet right in the same hole.
This forms the top "half" of your star/daisy -- you'll see it when you turn the work back around.

Make two half-double crochet stitches into the next "hole" and into each next hole
all the way down the row.

When you come to the end of the row, yarn over and insert your hook into the top of the chains there (make sure to poke your hook through two loops of the chain stitch).
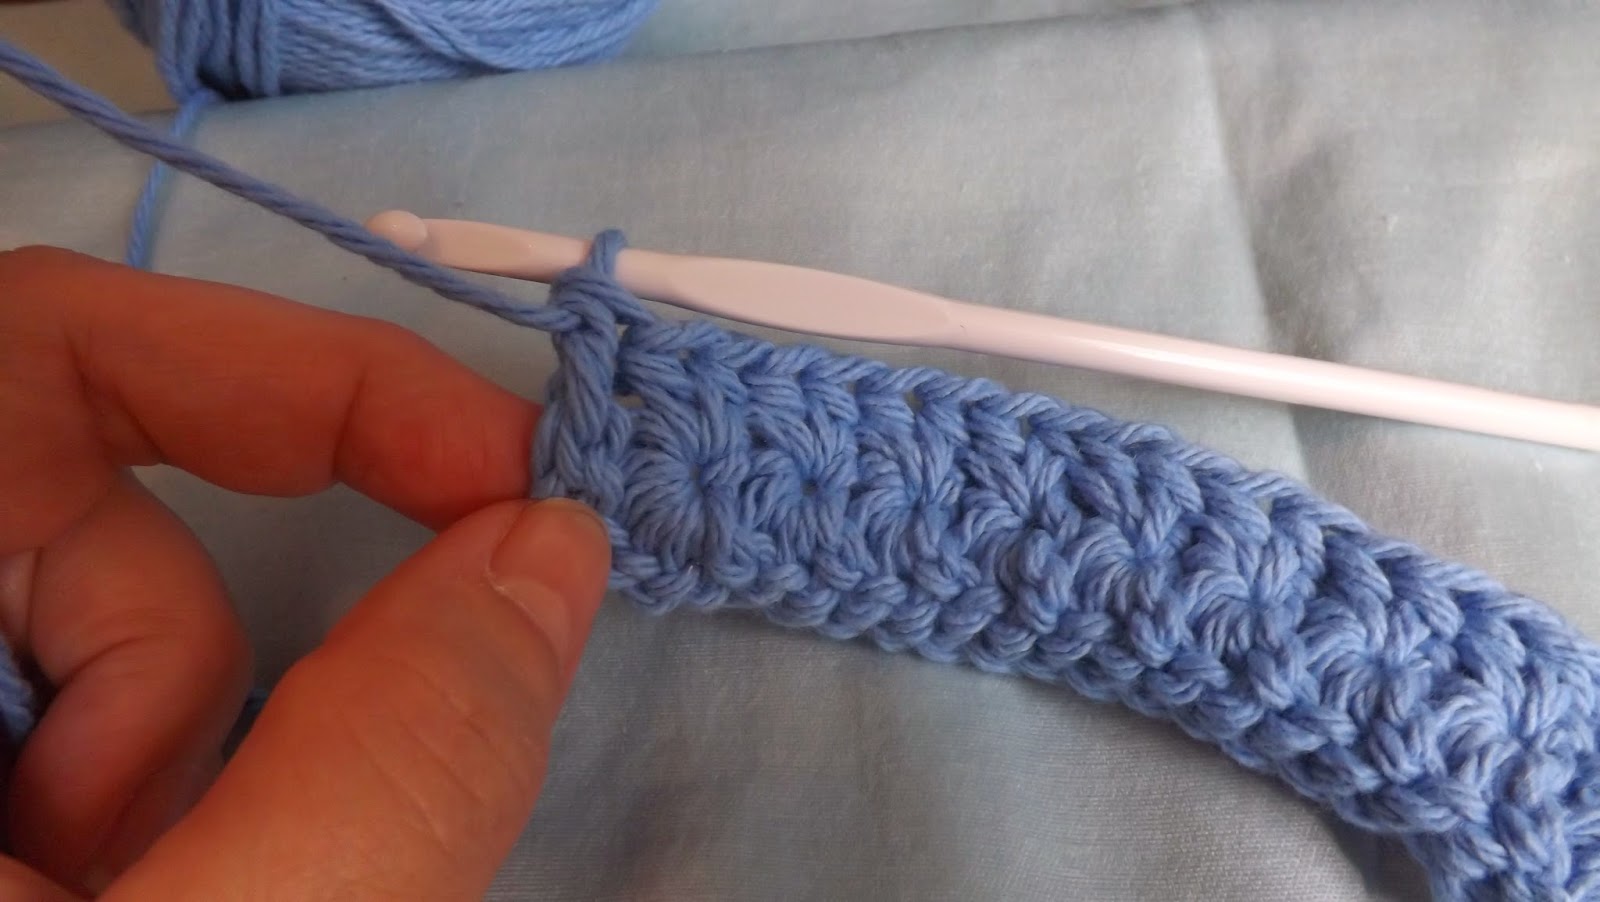
And make a double crochet (yarn over, pull loop through to front, three loops on hook, yarn over, pull two loops off hook, yarn over again, pull two loops off hook).

Turn the work around, again making sure to keep your working yarn behind the work.

To begin the next row of stars, chain three...

I turned this so that it's easier to see... insert your hook into the second chain from the hook and pullup a loop, and into the third chain from the hook, and pull up a loop,
so that there are three loops on your hook.

Next, insert your hook into the BACK LOOP of the next stitch...

...keep inserting and pulling loops up through the back loops of the next two stitches, so that there are six loops on your hook. (Six loops on your hook = you're about to make a petal cluster, just as you've been doing.)

Just as before, softly slip stitch right through all six loops, insert hook into center hole, back loop of last of the previous six loops, stretched-out chain stitch, and next two chains...

...so that there are six loops on the hook...

and slip stitch to close... now maybe you're starting to feel the rhythm of the stitch, and if you've stayed nice and loose, you should be gliding right along through your field of daisies, mama.

When you come to the end of the row, the last two loops of your six petal-loops that you will pull up will be pulled through the two chain stitches right there. (It may look as though you've run out of places to insert your hook and pull loops through, but there will be two chain stitches at the very end.)

I will stop here for now, but you would continue by turning the work around, chaining two, and finishing your stars with a row of half-double crochets in the center holes... and then just keep repeating the first and second rows for as long as you like.
♥
